• BOOK
  • APP
    • About the App
    • iPhone tutorial
    • iPad tutorial
    • FAQs
    • App troubleshooting
  • ABOUT

Mobile Menu

  • PLAN
    • Planner templates
    • Meal plans
      • Summer
      • Autumn / Fall
      • Winter
      • Spring
    • How-to
  • BUY
  • COOK
    • Breakfast
    • Snacks & lunchbox
    • Meals & dinners
    • Sides & salads
    • Desserts & special occasion
  • Search
  • Email
  • Facebook
  • Instagram
  • Pinterest
  • Twitter
  • YouTube
  • Menu
  • Skip to left header navigation
  • Skip to right header navigation
  • Skip to main content
  • Skip to secondary navigation
  • Skip to primary sidebar
  • Skip to footer

Before Header

  • Email
  • Facebook
  • Instagram
  • Pinterest
  • Twitter
  • YouTube

PlanBuyCook

Meal planning made simple

  • BOOK
  • APP
    • About the App
    • iPhone tutorial
    • iPad tutorial
    • FAQs
    • App troubleshooting
  • ABOUT
  • PLAN
    • Planner templates
    • Meal plans
      • Summer
      • Autumn / Fall
      • Winter
      • Spring
    • How-to
  • BUY
  • COOK
    • Breakfast
    • Snacks & lunchbox
    • Meals & dinners
    • Sides & salads
    • Desserts & special occasion
  • Search

Halloween: severed fingers

You are here: Home / PARTIES / Kids parties and cakes / Halloween: severed fingers

27/10/2017 By //  by Gaby Leave a Comment

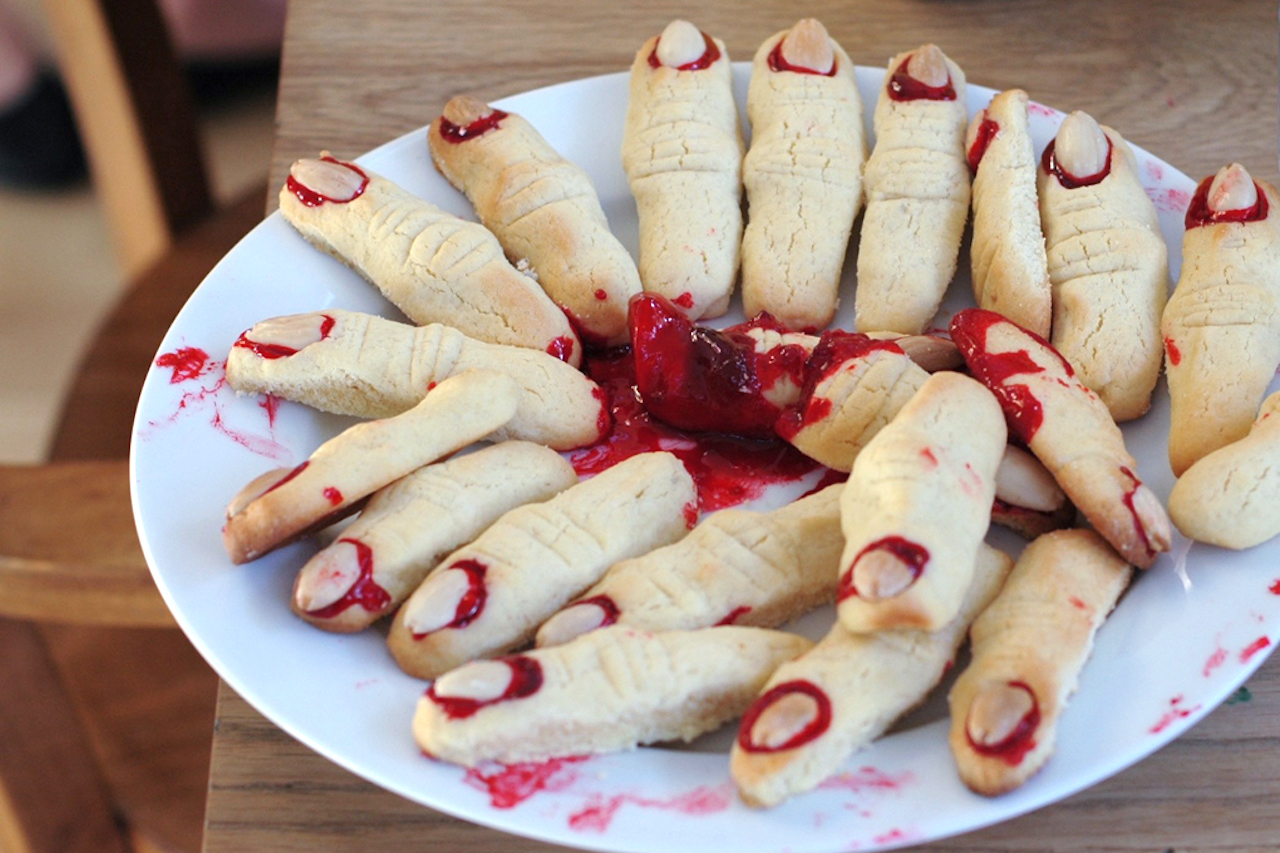
Up the gore with these severed fingers this Halloween. They make a great Halloween display or offering at a ghoulish party. Use food colouring in the jam (jelly) to bring a lifelike colour to the ‘blood’ under the ‘fingernails’. Happy Halloween.

SEVERED FINGERS

Prep: 5 mins
Cook: 30 mins
Makes: 20 fingers

Ingredients

  • 125g / 1 stick of unsalted butter
  • 1 cup of caster/superfine sugar
  • 1 egg
  • 2½ cups plain flour, sifted
  • 20 blanched almonds
  • 50g / 2oz of strawberry jam/jelly (or any jam you have will work with food colouring)
  • red food colouring

Method 

  1. Preheat oven to 160º C /325ºF/Gas mark 3.
  2. Line 1–2 baking trays with baking (parchment) paper.
  3. Cream the butter with a mixer until pale and fluffy.
  4. Add the sugar and continue to cream until sugars are dissolved.
  5. Add the egg and beat until combined.
  6. Scrape down sides of the bowl and add the flour and mix on lowest speed.
  7. Remove bowl from mixer and mix with a spatula.
  8. With damp hands, roll the mix into finger length and sized logs and place them on the trays. Shape them into fingers by making them thicker at the knuckles, and then use a knife to make the creases on the knuckles.
  9. Push an almond into one of the ends to make the fingernails. That end should be a little flatter than the ‘severed’ end.
  10. Bake in the oven for 15 minutes. Try not to let them colour too much.
  11. Combine the jam (jelly) with the food colouring and set aside.
  12. Cool on a wire rack. Carefully remove the almonds one finger at a time, and place a small amount of the coloured jam onto the ‘nail bed’ then push the nail back into the bed, allowing the jam to ooze out from all around the almond.
  13. Add more jam at the severed ends if you wish, and scare the daylights out of your guests/trick o’ treaters.

TIP
Make them thinner than normal fingers as they do puff up slightly.

Filed Under: Kids parties and cakes, PARTIES

Get the Plan Buy Cook meal planning app, available for iPhone and iPad to get dinner done. The Plan Buy Cook Book is available worldwide via Amazon or at all good Australian bookstores and online through Booktopia.

Related Posts

You may be interested in these posts from the same category.

Anzac biscuits

Scones

The best hot cross buns ever

Valentine’s Day sweethearts

Berry panettone dessert

Chocolate hazelnut semifreddo

Caramelised onion and goats’ cheese tarts

Chocolate truffles

Homemade sausage rolls

Kids’ party food

Rocky road

Spicy nut clusters

Previous Post: « Bean quesadillas
Next Post: Halloween ghosts Meringue ghosts from PlanBuyCook»

Reader Interactions

Leave a Reply Cancel reply

Your email address will not be published. Required fields are marked *

Primary Sidebar

Plan Buy Cook Book

Plan Buy Cook App

Handy planners

Recent Posts

How to BBQ: barbecue tips

08/09/2021

Mango chicken

07/09/2021

Arun’s lentil soup

25/07/2021

Poached ginger chicken

17/06/2021

Footer

Tip of the week

Salads are best served at room temperature. If making them in advance, take them out of the refrigerator in time to get to room temp.

  • Email
  • Facebook
  • Instagram
  • Pinterest
  • Twitter
  • YouTube
  • Contact Us
  • Sitemap

Site Footer

  • Contact Us
  • Sitemap

Copyright © 2025 · Appetising Ideas